SR-201 Network Relay card
Why I bought a SR-201 Network Relay card.
Nowadays, when it is so popular with energy-saving measures and the “Internet of Things” is the thing, I came up with the brilliant idea that I could actually shut down our network in the house during the night when no one is using it to save some energy.
So I searched eBay for a relay controlled via the network. I found this.
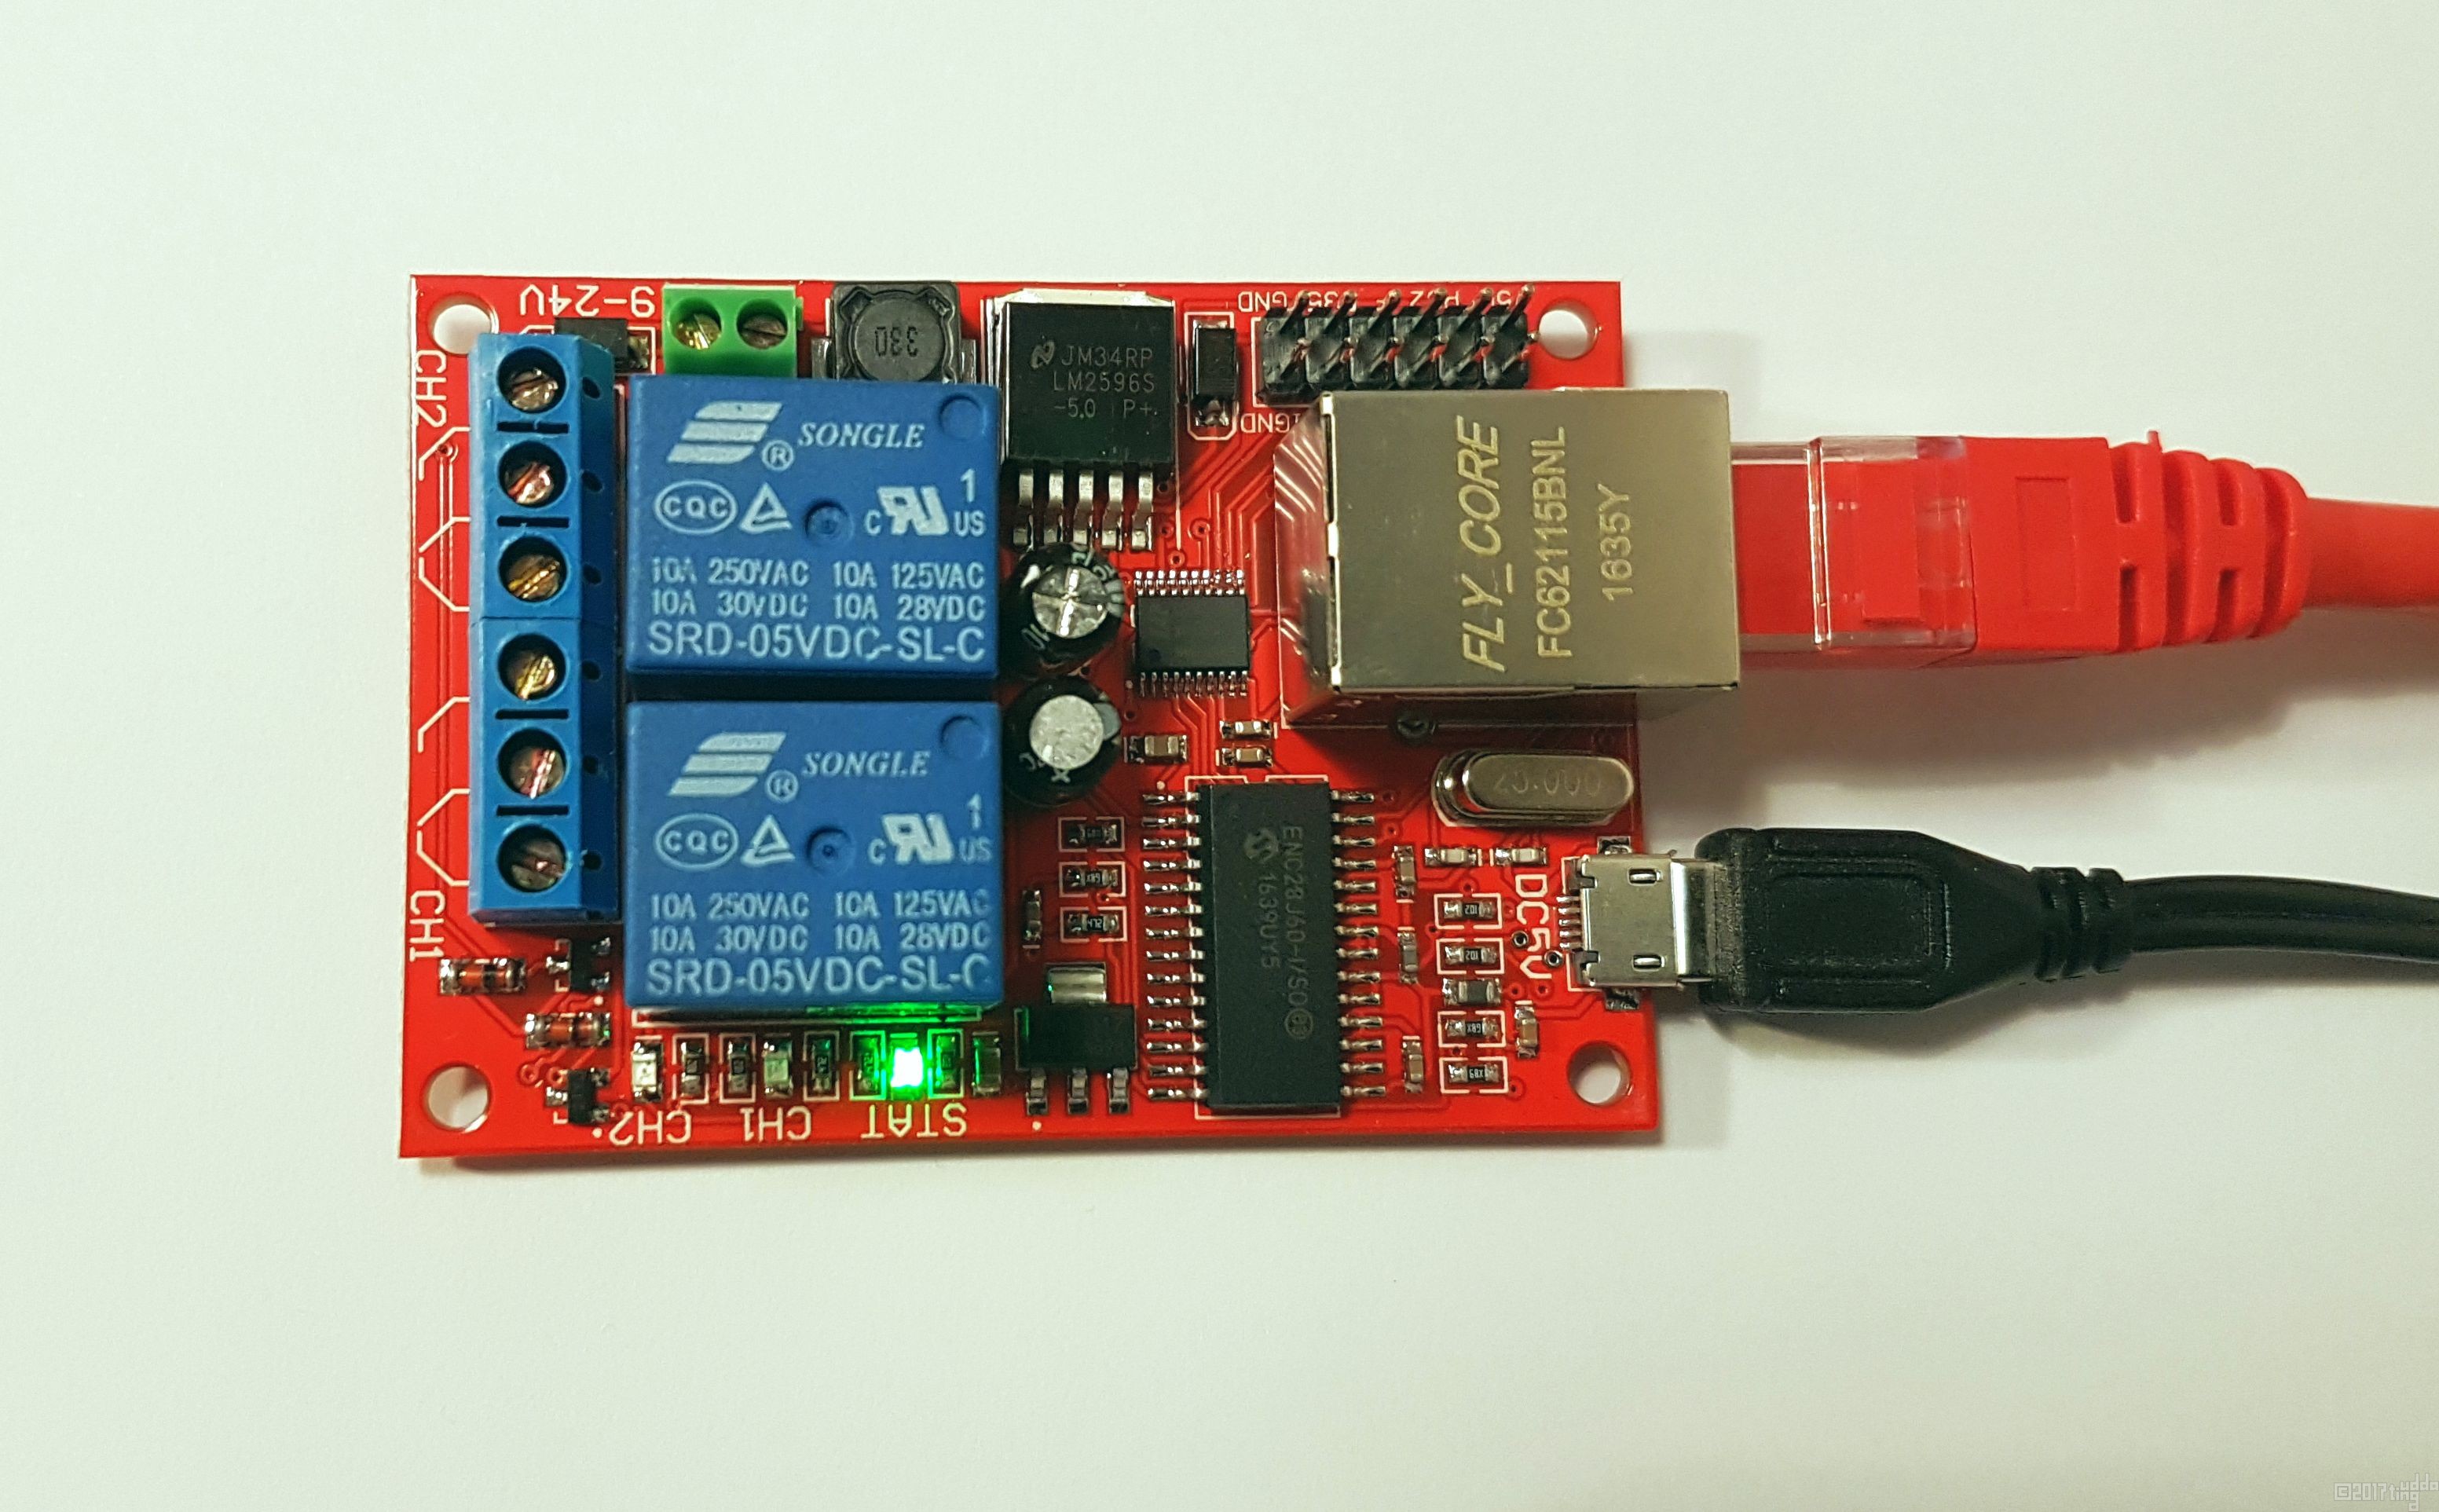
The card costed about $15, and after a brief moment of consideration, I bought it. The long wait began. After a month it turned it up in the mailbox. But once on the desk, connected and ready, problems began to pile up. I usually use the Angry IP tool to look up the IP number of new units that I connect to the network. But no new IP numbers showed up when I searched, so after a bit of Googeling, I found out that the relay board had IP number 192.168.1.100, a number that I already use for other things. But how do you reconfigure the card?
More Googeling.
There was apparently software to this card but there were no software included in the package, something that was apparently a common problem. I started to change IP number on my machine with IP 192.168.1.100 and then managed to make contact with the relay card and managed to reconfigure it to another IP number with the software that I finally found, in Chinese!
Edit 2023-05-08
Above links does not work all the time. If it does not work use the link below.
Documents:
http://www.tutuuu.com/download/sr-201-eng.rar
Password:www.tutuuu.com
SR-201 Network relay factory configuration.
| IP-address | 192.168.1.100 | network parameters can be configured through software. |
| Standard Gateway | 192.168.1.1 | |
| Net mask | 255.255.255.0 | |
| TCP-port | 6722 | port can not be reconfigured. |
| UDP-port | 6723 |
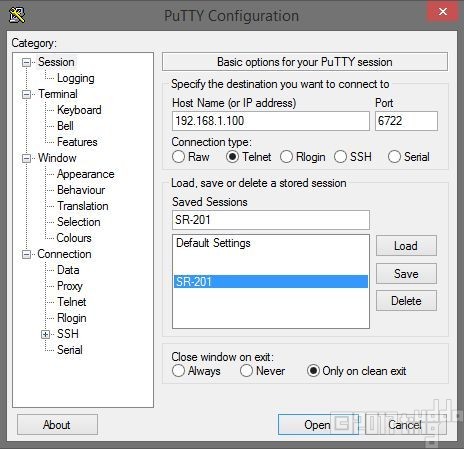
Control the Relay card with a terminal client like PuTTY
You can control the relay board with a terminal client, I use PuTTY just because I happen to have it installed, you can probably use any terminal client. I made the settings as shown below. Click “Open” then open the terminal window. Then, just to send commands to the relay board.
Status           - 00
Pull relay 1     - 11
Release relay 1  - 21
Pull relay 2     - 12
Release relay 2  - 22

Delay 1 to 65535 seconds.
To pull the relay no 2, enter 12 in the terminal window and press enter. And then to release it again, enter 22 and press enter. You can add a delay, in seconds. You do this by typing, for example 12: 28800 and then press enter. This results in that the relay is activated for 8 hours. You can have a delay of a maximum of 65535 seconds or 18 hours, 12 minutes and 15 seconds, if I not counted wrong.
The above information can be use if you want to make your own program to control the relay card.
Here is a small instructional video about the above concept.
Leave a Reply
Want to join the discussion?Feel free to contribute!